I'm amazed at how superior your vanilla is!
– Des, The Grommet
The year I turned 15 I spent the summer with my cousins in Connecticut. I had been cooking since I was very young and especially loved to bake. One afternoon when my cousin and I were hanging out with a friend down the road, the friend’s dad asked if I would teach his daughter to cook. Being 15, cream puffs seemed like a great idea as we could eat the lesson. Much more interesting than something practical like French toast, hamburgers or soup. In the middle of making the cream puffs there was a thunderstorm. As California doesn’t get rain in the summer and we rarely have thunderstorms, I was quite surprised when we ended up with a soupy mess. While I don’t know that the thunderstorm and the humidity caused the fail, they were the likely suspects. This is the first — and only — time I ever had trouble with cream puffs. Until this week.
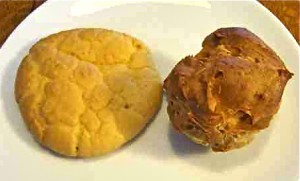
What happened? I wanted to make gluten-free cream puffs.I found a couple of recipes online and followed the instructions carefully. The batter came out soupy. I carried on, added a little more gluten-free flour and baked off the cream puffs. They spread out and, although they rose a bit, they looked more like frisbees than cream puffs. You can see the difference here.
 I was equal parts frustrated and curious, so I got out Shirley Corriher’s book, Bakewise. Shirley is a food scientist and baker with a lifetime of experience determining how all things culinary work. Or don’t. As it turns out I learned a lot, much of which I will share with you. As choux paste is used for more than eclairs and cream puffs, knowing how to properly make Magic Puffs as Shirley calls the tiny balls that turn into fluffy-looking, crispy pastry, can help you to make delicious appetizers, entrees and desserts using the same basic batter. What changes are the fillings. You can also make French gougeres (pastry with cheese in the dough), cruellers and even some over-the-top fancy desserts, so it’s a good skill for any baker’s repertoire, and knowing how to make the batter work saves time and money. I’m sharing the basics that will help. For more useful food chemistry assistance for any kind of baking. I really recommend Bakewise, as Shirley not only decodes the hows and whys of baking, she provides recipes that always work if you follow her instructions. She’s been the guide for many of today’s well-known cookbook authors, bloggers and pastry chefs, so it’s a worthwhile investment to have her book on hand.
The basic ingredients for choux paste are water (or milk), butter, flour and eggs. It’s a combination of the type and amount of these ingredients that make or break the recipe.
Eggs: Yolks are great emulsifiers; whites are incredible drying agents. Eggs provide the necessary “puff.” By using egg white with whole eggs, it prevents a gooey inside to the pastry. The more eggs, the more puff — to a point! This is why you will add the eggs slowly to make sure you don’t get too much egg and end up with soupy batter. It is also why you make certain that you have completely incorporated each egg before adding another one.
Flour: Bread flour works best in making choux paste as gluten plays an important role. It forms good elastic sheets that produce higher and lighter puffs. It also absorbs liquid so the dough gets firm enough to hold more eggs, that help the dough rise. It isn’t critical to use bread flour but, if you live in the South where the wheat isn’t as high protein as wheat grown in the North or West, buy bread flour.
I use Pamela’s gluten-free bread mix for the gluten-free puffs. The batter absorbed less egg, so the puffs rose moderately well but it would be tricky to make really big puffs without adjustments. Three things you can do: Cut back on the butter by two tablespoons, eliminate one of the egg yolks in the recipe but use the egg white, and add a teaspoon of double acting baking powder or Ammonium Bicarbonate (found at some drugstores ) with the flour. Additionally, make sure you beat the batter a little longer than seems necessary.
Liquid: Water is the standard for choux paste. Milk, however, makes the paste richer and helps it to brown more evenly. Either choice or a mix of both is fine.
Fat: Fat is used for flavor. Less fat means you can add more egg and get a bigger puff; with more fat you get a more tender puff. Using less butter means more gluten will form and you’ll get a lighter puff.
Tips
When you heat the oven to bake choux paste, arrange the oven shelf on the lower third of the oven. If you have a pizza or baking stone, put it in on the shelf to heat. The heat from the stone helps to cook the puffs from the bottom up so the top of the puff has more time to rise. (This tip is also useful for baking single crust pies and even blind crusts as it crisps them so they don’t get soggy.)
Place a few clean small rocks in a metal pan with 2-inch sides and place the pan on the floor of the oven near the door. You will pour about 2 cups of boiling water over the rocks just before you place the puffs in the oven. This will create a steam bath to keep the oven moist and allow the puffs to rise well before they crust.
Add the bread flour all at once and stir vigorously. This will make a dough ball that pulls away from the pan. Place the pan back on medium heat and, using a heavy wooden spoon, heat and stir for at least 3 minutes, spreading the dough out and gathering it back up. Your goal is to dry the dough out as much as possible but not let it brown. Remove from the heat and place the dough in the bowl of a food stand mixer with a paddle or into a mixing bowl to beat with a hand mixer or by hand.
You want to add as much egg as you can, but the dough must remain thick enough to spoon or pipe it into balls that will hold their shape. Place a spoon of dough on a plate to see if it will stand without spreading out. If it is firm enough and not spreading too much, beat 1 more egg, and add about half of it and process to beat in well. If you think it will hold the last half of the beaten egg, process it in too.
You can choose to pipe the dough or not. It isn’t critical for good results. I nearly always use a spoon as it’s one less step.
If you do decide to pipe the batter, Chef Kathleen Stewart suggests this tip for uniformly shaped puffs: Using a dark pencil or pen, draw three or four 1-1/2-inch-wide strips onto the parchment paper, spacing them about 2 inches apart. Turn the paper over and place on the baking sheet. You should be able to see the strips on the other side and you don’t want to pipe the dough directly onto the pencil or pen markings. Pipe the dough into mounds set between the parallel lines.
Spoon or pipe the dough onto the heavy baking sheet covered with parchment paper or sprayed well with nonstick cooking spray. The puffs will triple in size when baked. For small, individual puffs, spoon or pipe evenly spaced balls about 1 to 1-1/2 inches in diameter and about 1 inch high. For medium to large puffs, spoon or pipe evenly spaced balls about 1-1/2 to 2-1/2 inches in diameter and about 1 inch high.
With the back of a greased fork, press the top of each puff gently at an angle to level it slightly. Then, go back and press each puff at an angle 90 degrees to the first press. Brush the puffs with beaten egg if a glossy surface is desired, taking care not to get any egg between the puff and the baking sheet. (You can also skip this step if making puffs that will have powdered sugar or chocolate glaze on top. You can also skip it and when the puffs come out of the oven, brush a little butter on top of the puffs. It also makes the finished puffs shiny.)
With a spritz bottle filled with water, spray the puffs fairly heavily to keep them moist and rising a little longer.
Wearing oven mitts, and being careful to keep your arm and face out of the way of the blast of steam that shoots up, pour the 2 cups of boiling water into the pan with the hot rocks and immediately close the oven door.
Place the baking pan in the oven. Turn the oven down to 400 degrees. Do not open the oven door during baking. Bake until the puffs are risen and well browned, about 25 minutes. You can turn the baking sheet at this point if your oven is hotter on one side than the other. Turn the oven down to 350 – 375 degrees and bake for another 20 minutes to dry the puffs out well. Remove from the oven and cut a small slit in the side of each puff to let steam escape and dry the inside.
Puffs can be used right away, or cooled completely and stored in heavy-duty zip-top plastic bags and frozen for up to 2 months. (The puffs are moist and contain eggs; if they are kept in a warm, moist spot, they will mold in a single day!) To reheat and crisp, bake for about 5 minutes in a 325 degree oven.
Shirley says, “Your overall goal is to have everything warm (the butter, the eggs, the pan), so that you will get steam in the dough in the oven faster. You are trying to get the puffs to rise as much as possible before the hot oven crusts the tops and holds them down.”
Filling for Cream Puffs and Eclairs
Instead of using all heavy cream for the filling, use 1 cup each creme fraiche and whipping cream, along with sugar and vanilla. Creme fraiche is a cultured cream. It stabilizes the whipped cream helping it to hold its shape and not weep.
Did you like this post?
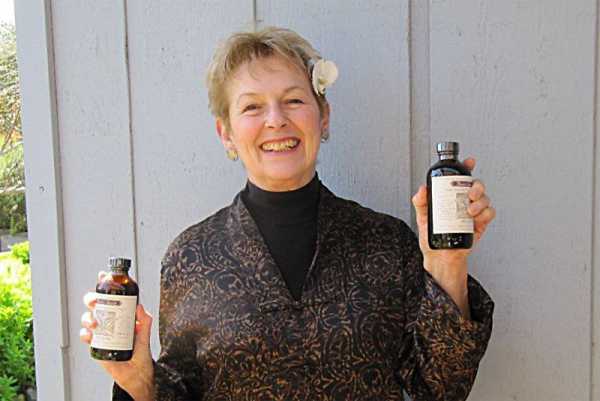
“Like” it, and share your thoughts in the comments below!I was given a small bottle of Rain’s Choice in a gift basket and I have been hooked ever since. The flavor makes all of my baking so much better! I will never use grocery store vanilla again!


© 2021. All Rights Reserved
Designed/Developed by Kat & Mouse